
Olidtech.com – Have you ever wondered how photographers make a sunset or speed up motion video? Well, it kind of technique called time-lapse or time-stop to capture serial of images and combined them to make one complete video. Surprisingly, iPhone’s native camera app has this feature to make time-lapse videos easily. Before you take some time-lapse video, there are some tips to improve time-lapse video quality. So, check this article to know the tips on how to use time-lapse on iPhone.
The key feature tips to use time-lapse on iPhone:
- Understanding time-lapse work on iPhone
- Lock autofocus and autoexposure while using the time-lapse feature
- Use a tripod or phone handled with stabilizing tools
- Knowing time-lapse work on iPhone
- Check your memory
- Charge your battery when you recording time-lapse mode
- Convert video file to time-lapse option
- Add music to time-lapse video
- The third-party camera app expands the time-lapse experience
Is The Time-lapse Feature As Same As Video Recording?
It is actually true that they have the same mechanism, but are different in their frame time. If you don’t know what is frame time means, it the time you capture an image in serial frequence. Put in a simple way, video is literally serial of pictures, and time-lapse is a slower version of it. Generally, smartphones can make a video with 30 frames per second (fps), that is 30 pictures for a 1-second video length. However, there are some cameras that can record with incredibly high speed (60 fps or even faster).
Time-lapse uses a slower frame rate to make a video since some moments can’t be fast enough to be noticed. It can be at least one or two frames per second or slower depending on how long the video length you want. For example, capturing a sunset moment on the beach need 1-hour of the actual recording, but the result came in just a few seconds. So, the more hours you spend on recording, the slower you adjust the frame rate setting.
How To Use Time-lapse On iPhone Camera Apps
Unlike Android that have many configuration and setting, iPhone has a simplicity to use the time-lapse feature. That is why iPhone may have more features than the Android in some cases. Moreover, you can use it without downloading any external apps since the native iPhone’s camera have built-in time-lapse apps.
Here is how to use time-lapse on camera apps:
- Open the camera apps.
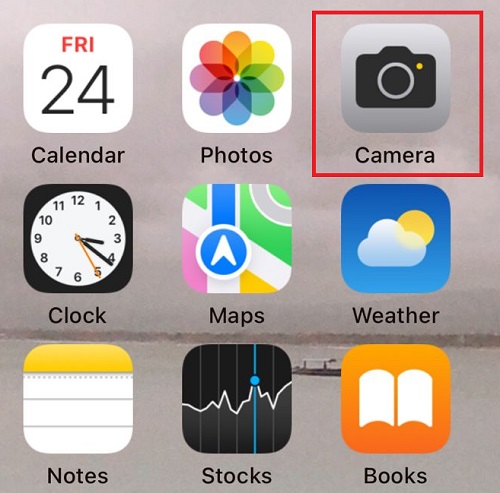
- Swipe to the left through the option if you using portrait mode or swipe to the bottom if you using landscape mode.

- Find time-lapse and configure your position.
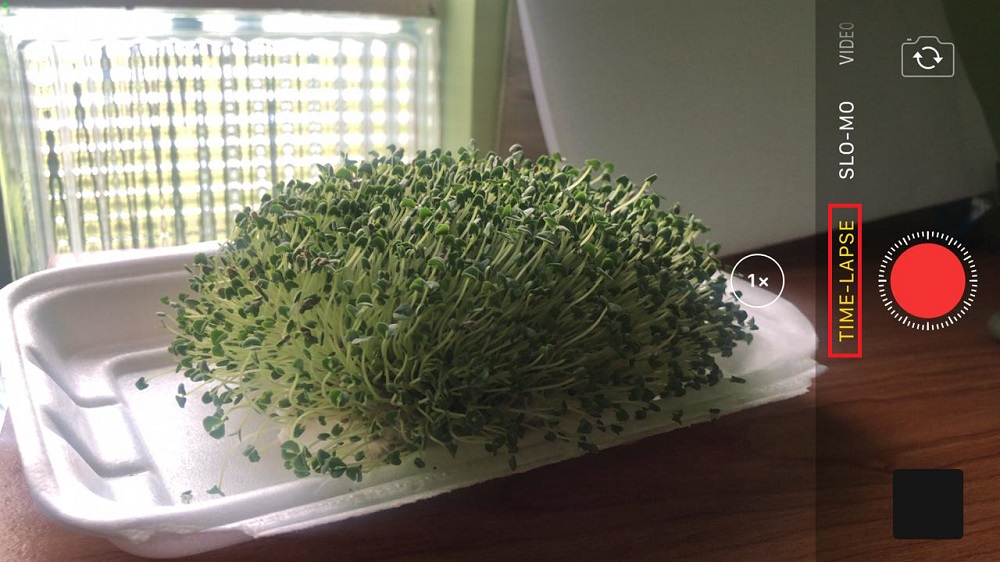
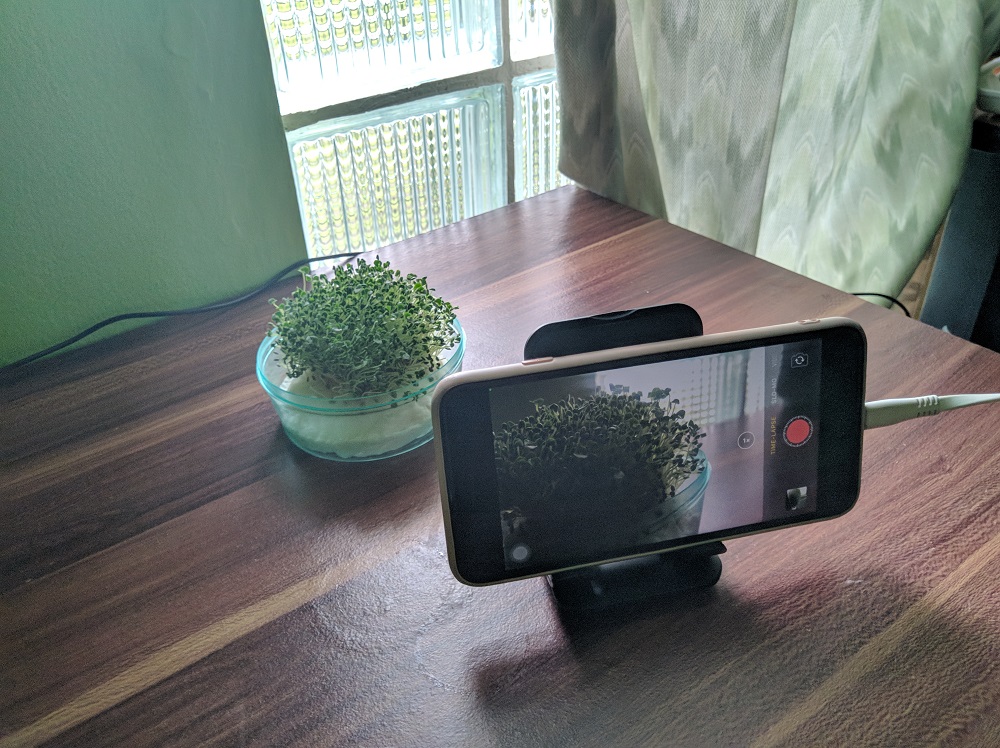
- Place your iPhone in a stable position (use holder, not by hand).
- Tap the red button and it will record a time-lapse automatically.
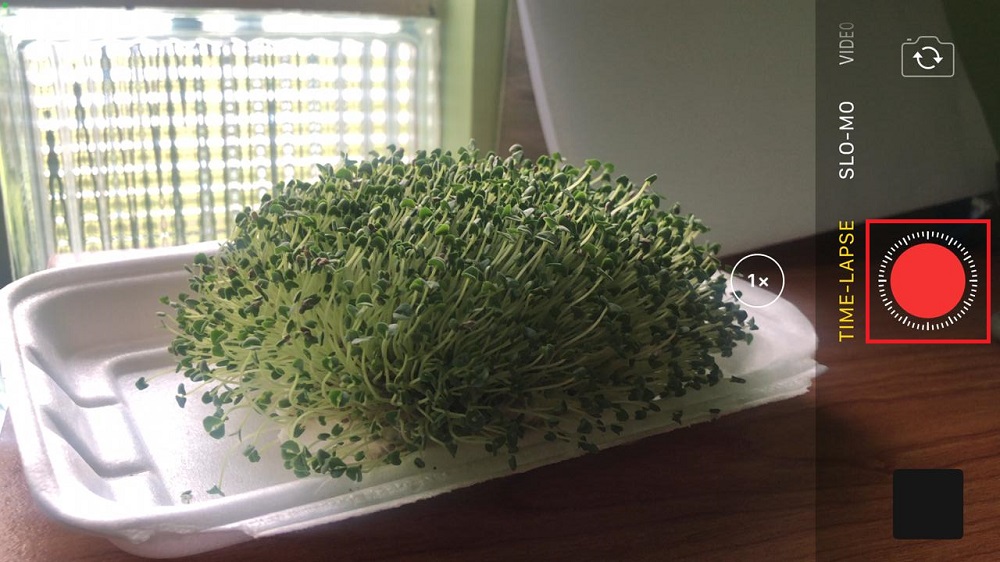
- Tap again the recording if you finished the video.
For example in this article, we use chia seed and sprout it while recording its development. It has slow movement and we roughly use 7 hours of real-time to record less than a 30-second video duration.
10 Tips You Should Know While Using Time-Lapse
Using time-lapse on iPhone is simple as pie. However, the result depends on how the person set the phone seamlessly. Amateur photographers may have wobbly time-lapse results if doesn’t know the standard how to make a time-lapse video on iPhone. Well, we suggest some best tips to improve your skill when using the time-lapse feature on iPhone’s camera.
There Are No Further Settings On iPhone’s Camera Time-Lapse
Yes, that is true. However, it is not a downside, but it is an advanced feature. The native camera app on iPhone doesn’t offer any setting to control the frame time, but it automatically configures the frame shot based on how long the video is being recorded. So, if you are a professional photographer and first time handling time-lapse on iPhone, don’t search frame interval setting on the camera setup. Just click it and start recording.
Knowing Time-Lapse Work On iPhone’s Camera App
Even though all settings are automated, there is some knowledge that you should know before using time-lapse on iPhone. The first thing is how to determine video output length. Frame interval usually controls the overall video length, but Apple makes it more simple. After all, time-lapse video length on iPhones is commonly between the 20s to 40s. In the first 10-minute recording, the camera capture two pictures per second, and the frame interval increases exponentially. So, 20-minutes will capture one picture per sec, 40-minutes capture one picture per two seconds, and so on. Moreover, we summarize the frame interval, the time recorded, and total video duration, if we use a 30 fps video format, are follows below.
| Time Recorded | Frame Interval | Times Faster | Total Video Duration |
| 9 minutes | 2 frames per second | 15x | 36 seconds |
| 10 minutes | 1 frame per second | 30x | 20 seconds |
| 19 minutes | 1 frame per second | 30x | 38 seconds |
| 20 minutes | 1 frame per 2 seconds | 60x | 20 seconds |
| 39 minutes | 1 frame per 2 seconds | 60x | 39 seconds |
| 40 minutes | 1 frame per 4 seconds | 120x | 20 seconds |
| 79 minutes | 1 frame per 4 seconds | 120x | 39.5 seconds |
| 80 minutes | 1 frame per 8 seconds | 240x | 20 seconds |
| 159 minutes | 1 frame per 8 seconds | 240x | 39.75 seconds |
| 160 minutes | 1 frame per 16 seconds | 480x | 20 seconds |
| 319 minutes | 1 frame per 16 seconds | 480x | 39.875 seconds |
| 320 minutes | 1 frame per 32 seconds | 960x | 20 seconds |
This table just approximately calculation of actual real-time recording and the result video length. So, you can use it to make a choice when you use time-lapse on a certain object with a better projection since the camera doesn’t apply a manual frame rate setting.
Lock Autofocus And Autoexposure While Using The Time-Lapse Feature On a Small Objects
In some cases, light from the sun isn’t mighty throughout the day. Cloudy weather can hinder sunlight and disturb the exposure while using time-lapse. To fix that, you can use other sources of light while locking auto exposure to hold the light composition. Moreover, you also can lock autofocus as well to focus on the focal point of the object while other things are moving around. These tips are usually used for small objects, but using them on bigger objects also pretty well such as recording busy times in the station or time-lapse while building the house.
Use a Tripod or iPhone Handled With Stabilizing Tools

Since recording time-lapse video takes a long time, it needs a steady tool for that. You can’t just use your hand to stabilize the phone, your hand will give up if you record a 10-hour straight video. Furthermore, it becomes wobbly and loses some focus. So, you can use a tripod that is specially built for the phone. If you don’t have it right now, you can make a DIY phone holder. Another thing that could boost your quality is using a gimbal stabilizer. Well, that extreme way to use the stabilized tool, but it provides a better image when used as a time-lapse or slow-motion video.
Check Your iPhone Memory
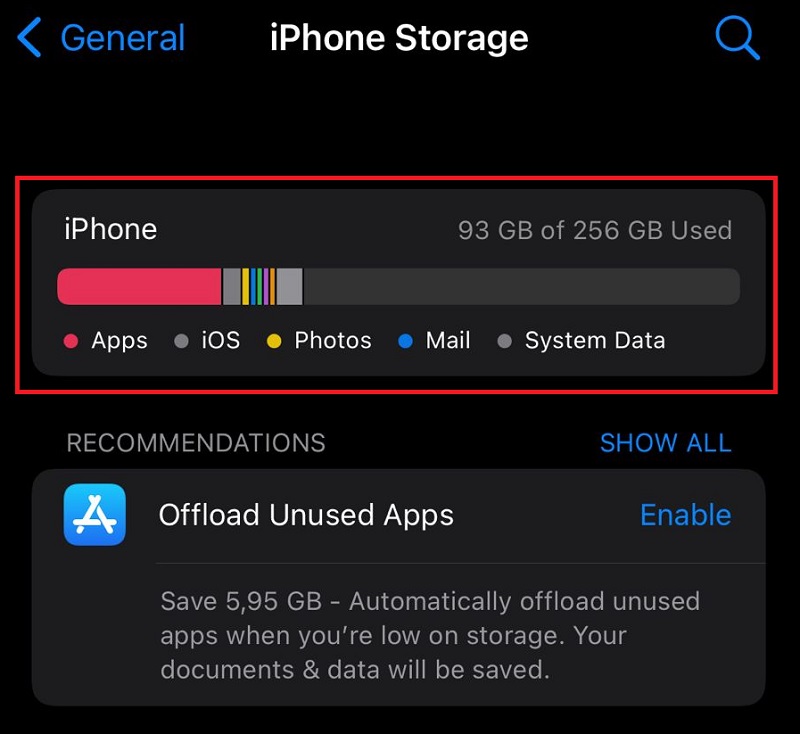
Despite making a time-lapse video doesn’t take space too much, it will stop when your phone storage is full. Sometimes, it may doesn’t automatically save the video and waste your time on it. The iPhone usually has two major storage, the little one is 64 Gb and 256 Gb for the larger. Moreover, iPhone in the latest model doesn’t have an external memory slot. So, before you take a time-lapse video with your iPhone, make sure to check the storage first since it is important to save the time-lapse result.
Charge Your Battery When You Recording In Time-Lapse Mode
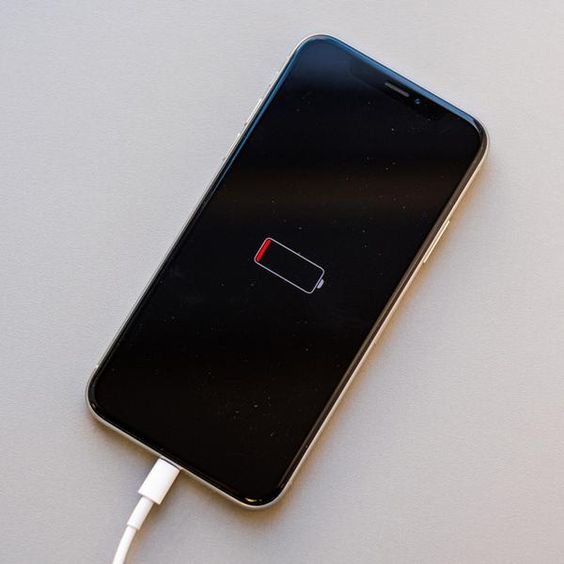
This tip is also important because it related to how long you make the time-lapse. In general, iPhone doesn’t have much battery to begin with. The pro max model has the highest battery, yet time-consumed recording can fastly drain the battery. In other words, you need to supply it while recording the video. Well, that’s the best solution to extend actual recording with a small battery. However, some people say that using an iPhone while charging is dangerous because it can overheat the phone. That is true, but you can limit other things that can lower the usage of the iPhone such as using airplane mode while charging the phone. We try out to disable mobile data while doing this, and it surprisingly has a bearable temperature and it is stable for long uses.
Convert Video File To Time-Lapse Option
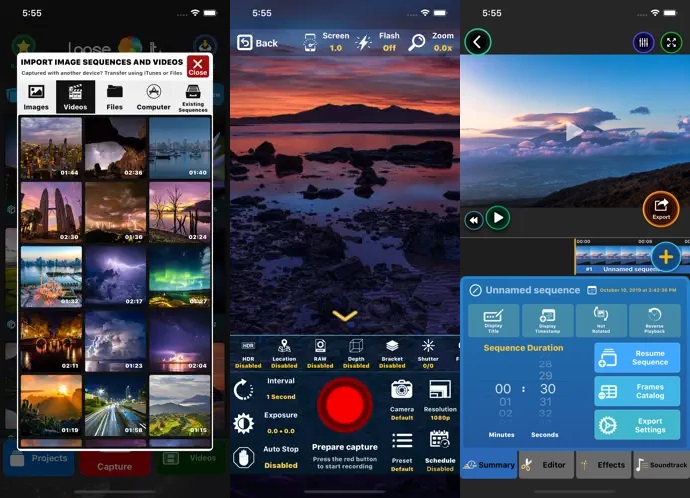
Sometimes, we can forget to change the option and accidentally record the object with a normal video setting. It is painstaking to produce that video, using large storage, and waste it if it’s removed. To correct this mistake, you can use Lapse It to edit it into the time-lapse scene. This is a third-party app that you can search on AppStore. How to use this app is simple. Firstly, install this app first on your iPhone. The next is to import your video into the app, select the video, and set the frame time. If you record on 30 fps, you can drop it to one fps and export to finish it.
Add Music To Time-Lapse Video
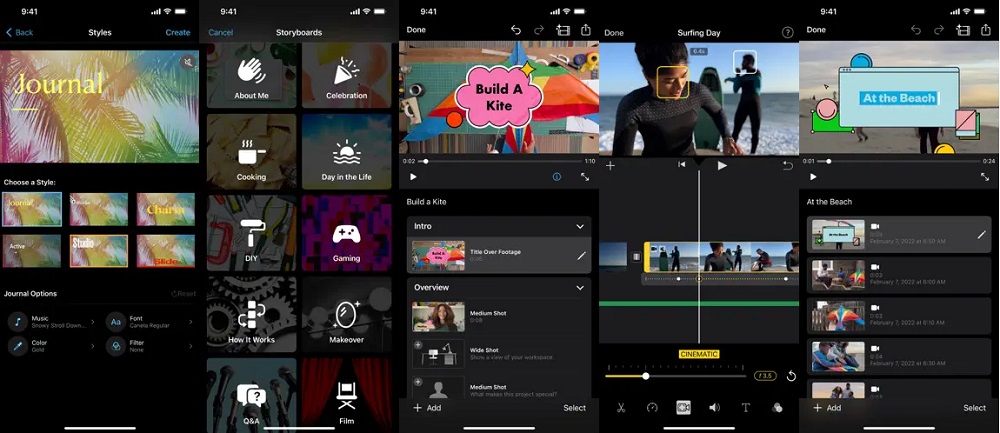
Another tip to improve time-lapse video is by adding some music. Well, it certainly needs editing skills to mash up video and music in one file. Certain apps like iMovie have an incredible tool to edit time-lapse products. It is not only just putting the music, but you can freely put some effect, color, and watermark on it. If you compare it to Adobe Premiere Rush, iMovie has disadvantages in some sectors, but overall, it still has good editing apps.
Third-party Camera App To Expand The Time-Lapse Experience
The iPhone’s native camera has an intriguing way to make a time-lapse video. However, for some people, it is too simplified so the user can’t manually control the time-lapse at all. Profesional usually uses manual settings to create time-lapse scenes more lively and iOS neglects it. So, you can give up for now and find an alternative way by using third-party camera apps.
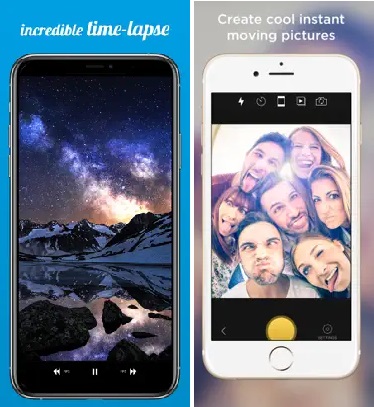
Some apps have great features and settings that can be applied to your iPhone. For instance, FrameLapse Pro and OSnap! Pro is a good choice to make time-lapse with adjustable settings. Even though it is not free, it offers great advantages to improve your photography skill. In fact, there is also a good time-lapse app that has been closed. Yes, Hyperlapse from Instagram is add on apps with better time-lapse settings. However, Instagram put it down in 2022 because they won’t focus on the main app. If you have installed this app before, you are lucky since it can’t be downloaded anymore.
Takeaway
Time-lapse is an intriguing video capture method that usually uses a real camera to produce it. However, iPhone has this feature on its camera option. You can simply use it with one click and record as long as you want. Moreover, this feature doesn’t have any manual setting, so it automatically produces based on how long the recording is. These features are not just for iPhone, but Android also has its way to produce them. On top of that, there will have a time-lapse option as an additional feature. We also create the best camera app for Android if you are interested in time-lapse stuff. So, you can check it to improve your photography skill with a mobile phone.